Banana blossoms are the large deep pink coloured specimens that hang at the end of a banana bunch (see image right, this photo is from http://travelingchili.com/articles/to-be-in-thailand-when-the-bananas-are-blossoming/ it also has a little more info on the banana blossom). I've only seen them fresh in a vietnamese green grocer on Victoria Street, Richmond in Melbourne, however they are sold canned at most Asian grocers. I discovered these artichoke like vegetables whilst watching a cooking show about 5 years ago. Not long after I went to Cookie on Swanston Street, Melbourne and saw banana blossom and chicken salad. It was served in a VERY spicy vinaigrette but so delicious!
This salad is much nicer served warm. If you don't have banana blossom, you can still make this salad, however it does add a really interesting texture to the salad.
Asian Style Warm Chicken and Banana Blossom Salad
Ingredients
Salad:
- 1/2 a yellow or red capsicum, julienned
- 1/2 a bunch of coriander, chopped
- 1/2 a bunch flat leaf parsley, chopped
- 3 kaffir lime leaves, julienned thinly
- 1 carrot, peeled and coarsely grated
- 1 can banana blossoms, drained, coarsely cut
- handful of fried onion or shallots (available from asian grocers)
- handful of mint, chopped
- 50g roasted cashews, chopped (or peanuts)
- 5 chicken tenderloins
- 1 tbsp kecap manis (indonesian sweet soy sauce)
- 1/2 a packet (approx. 100g) mung bean noodles
- 4 green onions, chopped finely
- 1/2 long mild red chilli
Sauce:
- 3 tbsp crunchy peanut butter
- 1 tsp brown sugar
- 1 tsp rice vinegar
- 1/2 tsp chinese cooking wine
- 2 tbsp soy sauce
- 1 tsp Hoi Sin BBQ sauce
- 1 tbsp Kecap Manis
- 1 tsp mirin
- 3-5 drops fish sauce
- 1-2 tsp Sambal Oeleck (chilli paste)
- 3 tbsp water
Method
1. Prepare all the vegetables, nuts and herbs and place in large bowl.
2. Place noodles in a bowl and cover with boiling water. Let rest for 5 minutes, drain and add to salad bowl.
3. Heat frying pan on a high heat with a little oil and add chicken, drizzle with kecap manis. Cook for only a few minutes on either side so the chicken is soft. Take the chicken off the heat and shred coarsely, add to the salad bowl.
4. Add all the ingredients for the sauce to a small saucepan and place over low heat, stir constantly. Ensure not to use fresh peanut butter as it will not bind well. Once all the ingredients have mixed together take it off the heat.
5. Mix the sauce into the salad straightaway. Serve sprinkled with extra fried onions :)
Thursday, July 15, 2010
Nana's Gazpacho
This is my nana, Esther's, recipe. Dad and I LOVE this soup. I think we always have seconds! Such an easy soup to make and perfect for summer.
Gazpacho
Ingredients
- 1 large cucumber, peeled
- 1 small onion, peeled
- 1/2 green capsicum
- 2 sticks celery
- 2 cans tomato, peeled
- 2 cloves garlic, crushed
- 1 1/2 cups tomato juice
- 1 1/2 tbsp white wine vinegar
- 1 tbsp olive oil
- 1-3 tsp tobasco (depending on how spicy you like it)
- 1/2 bunch coriander
- 1/2 bunch flat leaf parsley
- salt
- pepper
Method
1. Place all ingredients into a processor and blend. Alternatively cut the vegetables and place all ingredients in a saucepan and use a hand blender.
2. Place soup in fridge for at least 3 hours before serving.
Enjoy!
Gazpacho
Ingredients
- 1 large cucumber, peeled
- 1 small onion, peeled
- 1/2 green capsicum
- 2 sticks celery
- 2 cans tomato, peeled
- 2 cloves garlic, crushed
- 1 1/2 cups tomato juice
- 1 1/2 tbsp white wine vinegar
- 1 tbsp olive oil
- 1-3 tsp tobasco (depending on how spicy you like it)
- 1/2 bunch coriander
- 1/2 bunch flat leaf parsley
- salt
- pepper
Method
1. Place all ingredients into a processor and blend. Alternatively cut the vegetables and place all ingredients in a saucepan and use a hand blender.
2. Place soup in fridge for at least 3 hours before serving.
Enjoy!
Labels:
Gazpacho
Wednesday, July 14, 2010
Russian Eggs
I woke up on my last full day in Melbourne with a bizarre craving for caviar. I have no idea why or what made me think of this salty delicacy. However, coincidently, later that day I conveniently overhead mum talking to my grandma, Gaba, about where to buy caviar. And so after telling mum about my craving she spoilt me and took me to the russian deli on Koornang Rd (Russian Tidbits). For lunch we indulged in fresh french baguette, good quality butter and caviar. YUM!
Later that day I remembered about russian eggs, a hors d'oeuvres that was often served at russian parties and always very popular. This recipe doesn't have exact measurements so just ensure that you try the yolk mixture to see if anything is missing and that it isn't dry.
Russian Eggs
Ingredients
- 6 eggs, hard boiled, peeled
- 2 tbsp mayonaise
- pinch of salt
- 1/2 tsp paprika
- 6 tsp red caviar
Method
1. Cut the eggs in half lengthways and gently scoop out the yolk into a bowl, placing the egg whites aside for later.
2. Mash the egg yolks and add mayonnaise, paprika and salt.
3. Very gently place the yolk mixture back into the egg whites.
4. Add half a tsp of red caviar to the top of each egg (as shown in the photo). Enjoy!
Labels:
Russian Eggs
Banana and Yoghurt Muffins
These muffins are so moist!! They have a very different consistency to your usual muffin. These muffins don't look particularly amazing however they taste delicious! This recipe is from www.taste.com.au. I changed the recipe a little and added cinnamon and used plain flour rather than self raising and tweaked some of the measurements so there wasn't as much oil used.
Banana and Yoghurt Muffins
Makes 15
Ingredients
- 2 bananas, peeled and mashed (preferably older as they have more flavour and are easier to mash)
- 1 egg
- 1 cup yoghurt (I used natural no fat yoghurt)
- 1/2 cup vegetable oil
- 1/2 cup white sugar
- 1 tsp cinnamon
- 1 1/2 cups flour
- 1 tsp bicarb soda
Method
1. Preheat oven to 180C.
2. In a bowl mix mashed banana, egg, oil and yoghurt into a smooth mixture.
3. Add sugar and cinnamon, mix.
4. Add flour and bicarb, half at a time, mix until just combined.
5. Place mixture into muffin tin or silicone muffin holders, filling only till 3/4 full.
6. Place in oven and bake for 25 minutes, test with a skewer. Take muffins out of oven and allow to cool for 5 minutes before eating. Enjoy!
Banana and Yoghurt Muffins
Makes 15
Ingredients
- 2 bananas, peeled and mashed (preferably older as they have more flavour and are easier to mash)
- 1 egg
- 1 cup yoghurt (I used natural no fat yoghurt)
- 1/2 cup vegetable oil
- 1/2 cup white sugar
- 1 tsp cinnamon
- 1 1/2 cups flour
- 1 tsp bicarb soda
Method
1. Preheat oven to 180C.
2. In a bowl mix mashed banana, egg, oil and yoghurt into a smooth mixture.
3. Add sugar and cinnamon, mix.
4. Add flour and bicarb, half at a time, mix until just combined.
5. Place mixture into muffin tin or silicone muffin holders, filling only till 3/4 full.
6. Place in oven and bake for 25 minutes, test with a skewer. Take muffins out of oven and allow to cool for 5 minutes before eating. Enjoy!
Labels:
Banana and Yoghurt Muffins
Lamb Stew
This stew is mum's recipe. I've never made a stew before and was surprised at just how easy it is to make. You can use any vegetables for this stew. It's important to use good quality lamb. I went to the butcher and asked him for non fatty lamb good for stewing and he cut me up a lovely piece of lamb but I forgot to ask him what cut it was!! Mum used lamb shoulder for this stew.
Lamb Stew
Ingredients
- 500g lamb for stewing
- 3 tsp moroccan spice mix (African spice mix can be substituted)
- 3 cloves of garlic, crushed
- 1.5 onions, cut in half, sliced
- 2 cups chicken stock
- 1 can diced tomatoes
- 1 large carrot, peeled and cut into chunks
- 2 potatoes, peeled and cut into chunks
- 1/4 cauliflower, cut into small chunks
- 3/4 cup of lentils
- 1 tsp paprika
- 1/2 tsp cumin seeds, powdered
- 1/2 tsp mixed herbs
Method
1. Brown half the lamb on a very hot, oiled frying pan. Add half the moroccan spices to the meat. Repeat with the other half of the lamb. Place browned lamb into the bottom of a casserole dish or large saucepan.
2. Throw in the onion and garlic into the original frying pan and brown. Once brown add to the casserole dish.
3. Pour in chicken stock and tomatoes. Stir and place over the lowest heat, with a closed lid for 40 minutes.
4. Add lentils, cauliflower, carrot and potato. Sprinkle with paprika, cumin, mixed herbs. Season with salt and pepper. Stir gently, cover and return to low heat for 50 minutes.
(Note: if the sauce is has not thickened after 40 minutes, thicken it by taking a few tbsp of the liquid and dissolving 1 tbsp flour and adding it to the stew.)
5. Serve sprinkled with fresh herbs.
Lamb Stew
Ingredients
- 500g lamb for stewing
- 3 tsp moroccan spice mix (African spice mix can be substituted)
- 3 cloves of garlic, crushed
- 1.5 onions, cut in half, sliced
- 2 cups chicken stock
- 1 can diced tomatoes
- 1 large carrot, peeled and cut into chunks
- 2 potatoes, peeled and cut into chunks
- 1/4 cauliflower, cut into small chunks
- 3/4 cup of lentils
- 1 tsp paprika
- 1/2 tsp cumin seeds, powdered
- 1/2 tsp mixed herbs
Method
1. Brown half the lamb on a very hot, oiled frying pan. Add half the moroccan spices to the meat. Repeat with the other half of the lamb. Place browned lamb into the bottom of a casserole dish or large saucepan.
2. Throw in the onion and garlic into the original frying pan and brown. Once brown add to the casserole dish.
3. Pour in chicken stock and tomatoes. Stir and place over the lowest heat, with a closed lid for 40 minutes.
4. Add lentils, cauliflower, carrot and potato. Sprinkle with paprika, cumin, mixed herbs. Season with salt and pepper. Stir gently, cover and return to low heat for 50 minutes.
(Note: if the sauce is has not thickened after 40 minutes, thicken it by taking a few tbsp of the liquid and dissolving 1 tbsp flour and adding it to the stew.)
5. Serve sprinkled with fresh herbs.
Labels:
Lamb Stew
Tuesday, July 6, 2010
Fettuccine with Creamy Mushroom Sauce
This is another simple but delicious dish great for a quick dinner. I recommend using a large frying pan to make the mushroom sauce so not to overcrowd the mushrooms and ensuring they brown, rather than saute. This results in the mushrooms having a beautiful golden colour and the water not being released from the mushrooms
Fettuccine with Creamy Mushroom Sauce
Ingredients:
- 2 1cm cubes of butter
- 1 onion
- 6 button mushrooms, sliced very thinly
- 1/4 tsp paprika
- 1/4 tsp italian herbs
- 3 tbsp cream
- salt and pepper to season
Method
1. Cut onion in half and slice thinly. Over a medium heat melt a little butter and add the onions. Cook until onions are golden.
2. Add the rest of the butter mushrooms and brown until golden.
3. Add paprika and italian herbs and stir.
4. Add cream, stir and reduce heat to low and allow to simmer for 10 minutes. Season with salt and pepper and serve mixed with freshly cooked fettuccine. Enjoy
Mixed Berry Tart
As per usual, I was craving something sweet after dinner. I had left over pastry sheets in my freezer from when I made the Spinach Ricotta and Feta Pies and so I made this easy but impressive looking tart. This is great and easy to make if you have unexpected guests or like me you crave a dessert. I love frozen berries, as they are reasonably cheap and are available all year round - I always have some in my freezer and recommend it.
Note that using the square pastry with pastry border enables you to make any type of fruit pie. Cut up some fruit very thinly, place on the pastry and dust with sugar, brush the pastry and bake :).
Mixed Berry Tart
Ingredients:
- 1/2 orange
- 2 tablespoons caster sugar
- small individual packets of frozen berries
- few drops of vanilla essence
- 1/2 tsp cinnamon
- 1 sheet of frozen puff pastry (I used Palmer's)
- milk for brushing
- sugar for dusting
Method:
1. Preheat oven to 180C. Squeeze juice of half an orange into a saucepan and add sugar. Stir over medium heat until the sugar has dissolved.
2. Add frozen berries, vanilla essence and cinnamon; mix and bring to the boil and then let it simmer on medium heat. Simmer for 10 minutes until majority of the liquid has evaporated.
3. Cut a 15cm square out of the pastry. Cut 1cm wide 15cm strips of pastry for the border. Arrange the strips around the square (refer to photo right ). Arrange the pastry on a lined baking tray. Add the berries into the centre of the pastry.
4. Wash the outside of the pastry with milk and sprinkle with caster sugar.
5. Place the tray in the oven for 15 minutes or until the pastry has puffed and golden.
6. *Optional* Whip fresh cream with vanilla essence and serve on top of the hot pastry. Enjoy :)
Note that using the square pastry with pastry border enables you to make any type of fruit pie. Cut up some fruit very thinly, place on the pastry and dust with sugar, brush the pastry and bake :).
Mixed Berry Tart
Ingredients:
- 1/2 orange
- 2 tablespoons caster sugar
- small individual packets of frozen berries
- few drops of vanilla essence
- 1/2 tsp cinnamon
- 1 sheet of frozen puff pastry (I used Palmer's)
- milk for brushing
- sugar for dusting
Method:
1. Preheat oven to 180C. Squeeze juice of half an orange into a saucepan and add sugar. Stir over medium heat until the sugar has dissolved.
2. Add frozen berries, vanilla essence and cinnamon; mix and bring to the boil and then let it simmer on medium heat. Simmer for 10 minutes until majority of the liquid has evaporated.
4. Wash the outside of the pastry with milk and sprinkle with caster sugar.
5. Place the tray in the oven for 15 minutes or until the pastry has puffed and golden.
6. *Optional* Whip fresh cream with vanilla essence and serve on top of the hot pastry. Enjoy :)
Labels:
Mixed Berry Tart
Sunday, June 27, 2010
Chinese Chicken and Corn Soup
On Thursday, Nick and I drove down to Byron Bay. Last time we were down there we both became obsessed with the Byron Bay Kebabs which we would eat breakfast, lunch and dinner. You would think we would be sick of them after constantly eating them for 5 days but we both have been craving the juicy marinated beef, fresh salads, flavoursome sauces and the toasted pita bread ever since. And so we went on a half day roadtrip to Byron Bay and indulged in the kebabs on the beach. On the way back we stopped at The Spit in the Gold Coast. This is an area along the marina, at the end of which is a hotspot for fishermen and tourists. Here we watched the sunset over the water, see photo, and worked up an appetite for dinner.
I had left over pieces of chicken tenderloins and was craving soup for dinner so I made this asian style soup. A perfect way to end the day. I'm sure this isn't the correct way of making this soup but none the less it tasted delicious. Use homemade chicken soup if you have it, as it really does make a difference to the taste. I recommend using Real Stock rather than stock cubes if you don't have homemade.
Chinese Chicken and Corn Soup
Serves 2
Ingredients
- 1.5 cups chicken stock
- 1 small can of creamed corn
- 1 small can of sweet corn
- 2 tbsp light soy sauce
- piece of fresh grated ginger (approx 2/3 size of your thumb)
- 1 egg, beaten
- 3 chicken tenderloins, cooked and shredded (any cooked chicken can be used)
- 2 green onions, green part only, sliced finely
Method
1. Bring chicken stock to the boil.
2. Add creamed corn, corn, soy and ginger and simmer for 10 minutes.
3. Reduce the heat to very low. Have the egg in a small bowl and using a whisk in the soup slowly drizzle the egg into the soup from a 15cm height.
4. Add chicken and green onions and bring to the boil. Take it off the heat and serve. Enjoy
Labels:
Chinese Chicken and Corn Soup
Sunday, June 6, 2010
Exotic Fruit Salad
I made this salad using canned fruit as I was craving fruit salad but couldn't find many exotic fruit at the green grocer. It turned out surprisingly good. Simone came over that night for dinner and brought over some other canned fruit that we added to the salad. This is a lovely and refreshing dessert, which looks and tastes great!

Exotic Fruit Salad
Ingredients
- 1 can lychees
- half fresh paw paw
- 1 can jackfruit
- small punet of strawberries
- 1 can of mango cheeks (use fresh mango if it's available)
- 1 can of logans
- 1 can of pineapple chunks
- 2 sprigs of mint
- 2 teaspoons of sugar
Method
1. Wash and cut paw paw and strawberries into chunks, add to serving bowl
2. Open lychee can and drain syrup into a saucepan. Place the lychees into the serving bowl.
3. Drain the logans and pineapple chunks and add to serving bowl.
4. Drain mango cheeks and jackfruit. Slice them into thin strips and add to the bowl.
5. In the saucepan with the lychee syrup, add the sugar and finely chopped mint. Put it over a very low heat and stir until the sugar dissolves. Pour over the salad and place in the fridge for an hour. Enjoy
Exotic Fruit Salad
Ingredients
- 1 can lychees
- half fresh paw paw
- 1 can jackfruit
- small punet of strawberries
- 1 can of mango cheeks (use fresh mango if it's available)
- 1 can of logans
- 1 can of pineapple chunks
- 2 sprigs of mint
- 2 teaspoons of sugar
Method
1. Wash and cut paw paw and strawberries into chunks, add to serving bowl
2. Open lychee can and drain syrup into a saucepan. Place the lychees into the serving bowl.
3. Drain the logans and pineapple chunks and add to serving bowl.
4. Drain mango cheeks and jackfruit. Slice them into thin strips and add to the bowl.
5. In the saucepan with the lychee syrup, add the sugar and finely chopped mint. Put it over a very low heat and stir until the sugar dissolves. Pour over the salad and place in the fridge for an hour. Enjoy
Labels:
Exotic Fruit Salad
Tuesday, June 1, 2010
Banana in Coconut Milk
It's been a while since I made anything with coconut and I had a ripe banana that had to be eaten so I decided to make this very simple thai dessert. This is the perfect quick dessert for a cold evening.
Banana in Coconut Milk
Ingredients
- 1 small can of coconut milk (light preferably)
- 1 very ripe banana
- 1 pinch of salt
- 2 tbsp sugar
- 1 tsp cinnamon
Method
1. Dissolve sugar, salt and cinnamon in the coconut milk over medium heat.
2. Slice the banana length ways and into 4-5cm pieces
3. Once the sugar is dissolved, add the bananas and simmer on low heat for 5-10 minutes, ensuring the bananas aren't overcooked and fall apart. Serve :)
Labels:
Banana In Coconut Milk
Parmesan Risotto with a Balsamic Reduction
I was just writing up the recipe for the mushroom risotto and began craving risotto for dinner. I had no mushrooms left so I decided to make parmesan risotto with a balsamic reduction. All the ingredients in this recipe are common ingredients you will find in the kitchen so it's a good dish to make when there's nothing in the pantry.

Parmesan Risotto with Balsamic Reduction
Ingredients
- 1 onion, thinly diced
- 2tsp butter
- 1 tbsp olive oil
- 3/4 cups arborio rice
- 1/4 cups white wine
- 500ml chicken stock
- 1.5/4 cups parmesan
- salt and pepper
- 2 tbsp balsamic vinegar
Method
1. Pour stock in a saucepan, bring it to the boil and then keep it on a very low heat to ensure it stays hot.
2. Heat 1tsp of butter and olive oil and add the onions. Fry until they are slightly golden. Add rice and stir for 2 minutes.
3. Add white wine. Stir continuously but gently until all the liquid has evaporated.
4. Add one ladle of the stock to the saucepan and stir continuously until all the liquid evaporates then add another ladle of stock.
5. Repeat step 4 for 20-35 minutes. Taste the rice to test if it is al dente. If the stock runs out, use hot water.
6. Once the rice is al dente add the parmesan, 1tsp butter, salt and pepper and then take it off the heat. Let the rice stand for 3-4 minutes before serving.
7. To make the balsamic reduction, pour the balsamic vinegar into a pan and put on medium-low heat and keep swirling the pan so that the vinegar doesn't burn. COntinue doing so until the vinegar begins to become slightly thicker and has large bubbles. Note that the vinegar will thicken once it cools down slightly.
8. Serve the risotto with the balsamic reduction drizzled over it.
Parmesan Risotto with Balsamic Reduction
Ingredients
- 1 onion, thinly diced
- 2tsp butter
- 1 tbsp olive oil
- 3/4 cups arborio rice
- 1/4 cups white wine
- 500ml chicken stock
- 1.5/4 cups parmesan
- salt and pepper
- 2 tbsp balsamic vinegar
Method
1. Pour stock in a saucepan, bring it to the boil and then keep it on a very low heat to ensure it stays hot.
2. Heat 1tsp of butter and olive oil and add the onions. Fry until they are slightly golden. Add rice and stir for 2 minutes.
3. Add white wine. Stir continuously but gently until all the liquid has evaporated.
4. Add one ladle of the stock to the saucepan and stir continuously until all the liquid evaporates then add another ladle of stock.
5. Repeat step 4 for 20-35 minutes. Taste the rice to test if it is al dente. If the stock runs out, use hot water.
6. Once the rice is al dente add the parmesan, 1tsp butter, salt and pepper and then take it off the heat. Let the rice stand for 3-4 minutes before serving.
7. To make the balsamic reduction, pour the balsamic vinegar into a pan and put on medium-low heat and keep swirling the pan so that the vinegar doesn't burn. COntinue doing so until the vinegar begins to become slightly thicker and has large bubbles. Note that the vinegar will thicken once it cools down slightly.
8. Serve the risotto with the balsamic reduction drizzled over it.
Mushroom Risotto
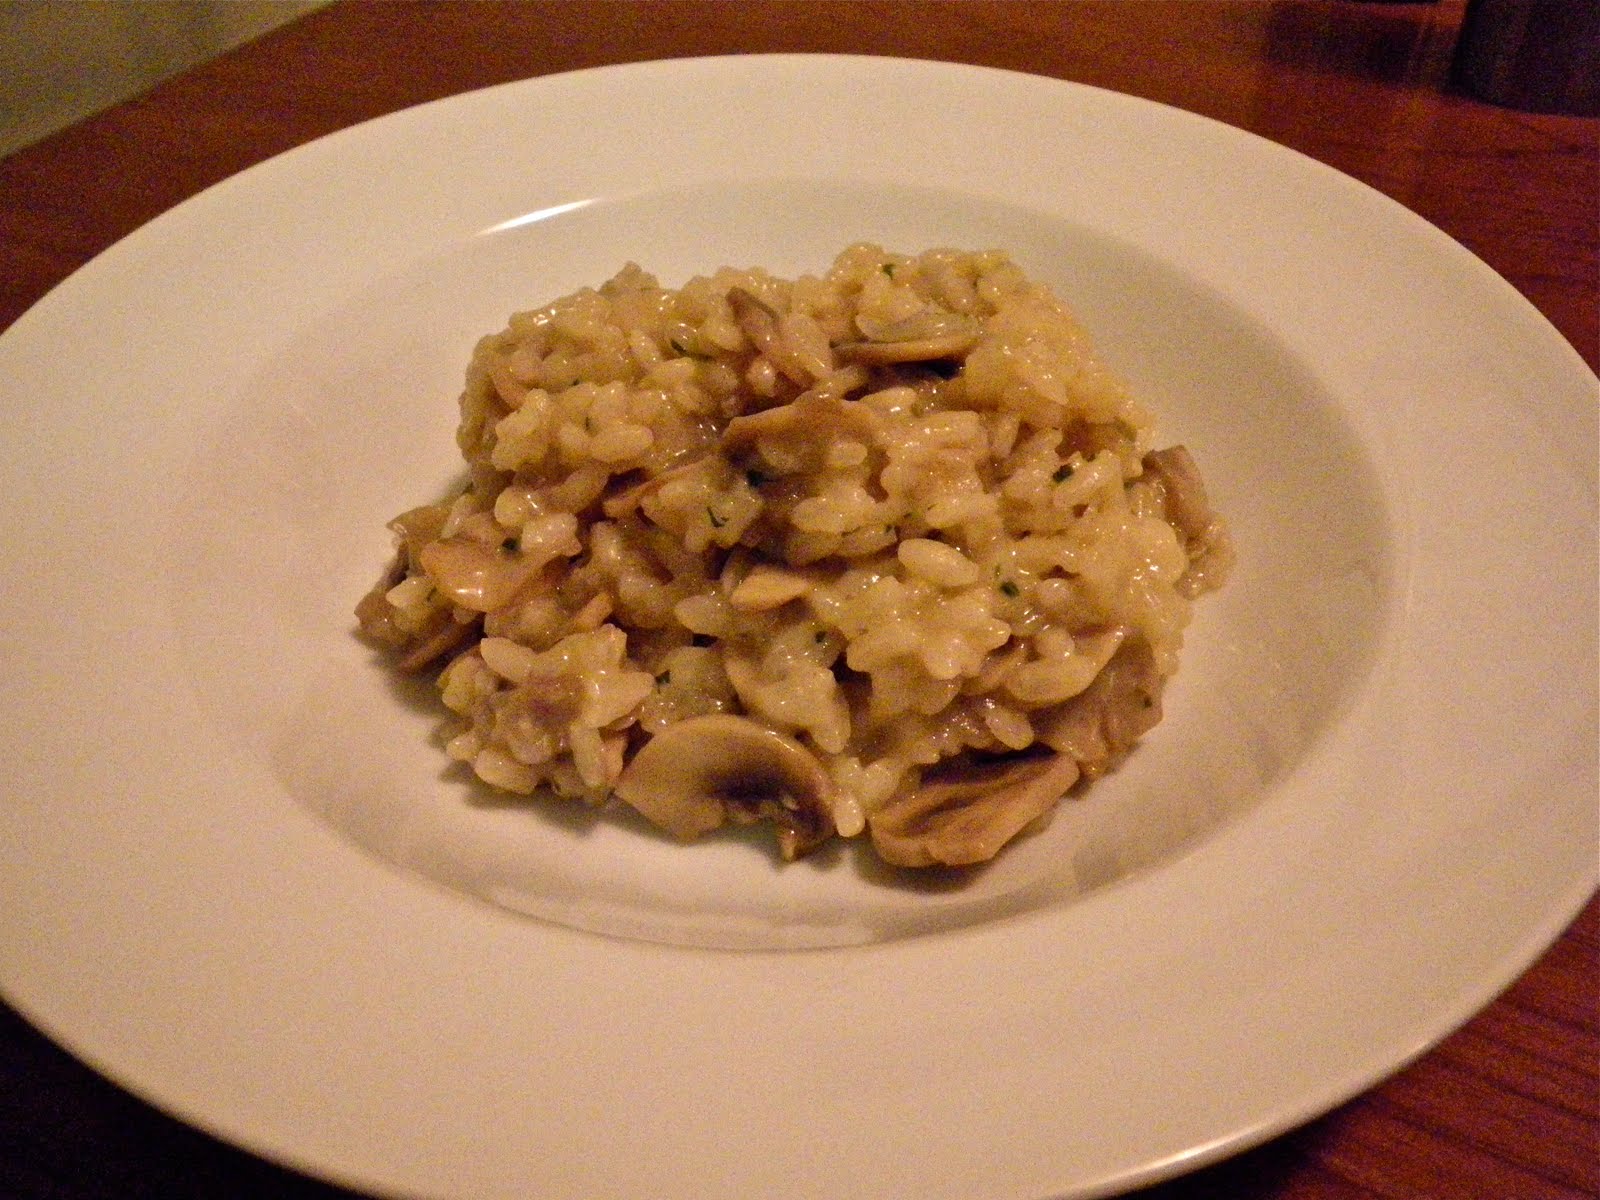
Simone came over for dinner last week and I made risotto as she has never tried it before. Simone brought over pumpkin soup which was delicious! (see photo below)

Risotto isn't overly difficult to make, just need patience. Using a few dried porcini mushrooms really enhances the flavour of the risotto, but if you don't have them, like me, the risotto is still tasty.
Mushroom Risotto
Ingredients
- 350-400g tray of fresh white mushrooms, washed and sliced very thinly (squeeze a little lemon juice over them)
- 1 onion, diced finely
- 60g butter
- handfull of fresh parsley or coriander, finely chopped
- 900ml chicken stock (I used Real Stock)
- 2 tbsp olive oil
- 1.5 cups arborio rice
- 1/2 cup white wine
- 3 tbsp grated parmesan

Method
1. Pour stock in a saucepan, bring it to the boil and then keep it on a very low heat to ensure it stays hot.
2. In a large saucepan place 20g of the butter. Stir in the mushrooms and cook them on medium heat until they give up their juices and begin to brown slightly. Remove the mushrooms into a side bowl.
3. Heat another 20g of butter and olive oil and add the onions. Fry until they are slightly golden. Add rice and stir for 2 minutes.
4. Add the mushrooms and white wine. Stir continuously gently until all the liquid has evaporated.
5. Add one ladle of the stock to the saucepan and stir continuously until all the liquid evaporates.
6. Repeat step 5 for 20-35 minutes. Taste the rice to test if it is al dente. If the stock runs out, use hot water.
7. Once the rice is al dente add the parmesan, 20g butter and pepper and then take it off the heat.
8. Let the rice stand for 3-4 minutes before serving. Enjoy
Risotto isn't overly difficult to make, just need patience. Using a few dried porcini mushrooms really enhances the flavour of the risotto, but if you don't have them, like me, the risotto is still tasty.
Mushroom Risotto
Ingredients
- 350-400g tray of fresh white mushrooms, washed and sliced very thinly (squeeze a little lemon juice over them)
- 1 onion, diced finely
- 60g butter
- handfull of fresh parsley or coriander, finely chopped
- 900ml chicken stock (I used Real Stock)
- 2 tbsp olive oil
- 1.5 cups arborio rice
- 1/2 cup white wine
- 3 tbsp grated parmesan
Method
1. Pour stock in a saucepan, bring it to the boil and then keep it on a very low heat to ensure it stays hot.
2. In a large saucepan place 20g of the butter. Stir in the mushrooms and cook them on medium heat until they give up their juices and begin to brown slightly. Remove the mushrooms into a side bowl.
3. Heat another 20g of butter and olive oil and add the onions. Fry until they are slightly golden. Add rice and stir for 2 minutes.
4. Add the mushrooms and white wine. Stir continuously gently until all the liquid has evaporated.
5. Add one ladle of the stock to the saucepan and stir continuously until all the liquid evaporates.
6. Repeat step 5 for 20-35 minutes. Taste the rice to test if it is al dente. If the stock runs out, use hot water.
7. Once the rice is al dente add the parmesan, 20g butter and pepper and then take it off the heat.
8. Let the rice stand for 3-4 minutes before serving. Enjoy
Labels:
Mushroom Risotto
Monday, May 10, 2010
Veal Marsala with Creamy Mushroom Sauce and Potato Mash
Veal is one of my favourite meats but I have never cooked with it but rather ordered it out at restaurants. This is the first time I cooked the veal and it turned out tender and flavoursome. Note that veal doesn't need a lot of different flavours, it doesn't freeze well and it only needs a few minutes on each side to cook through, any longer and it will become tough.
Veal Marsala
Ingredients
- 2 veal, schnitzel or 4 escalopes
- 50g of flour
- salt and pepper for seasoning
- 4 tablespoons marsala
- 4 tablespoons stock (i used chicken real stock)
- 40g butter
Method
1. Spread flour on a plate and season with salt and pepper. Dredge the veal in the flour.
2. Heat the pan. Add butter. Once the foam of the butter subsides, place the veal onto the pan. Cook for a few minutes on each side and remove from pan.
3. Turn down the heat to medium heat. Add the marsala and stock to the pan. Scrape the meat and flour residue from the pan and let the sauce cook for 3 -4 minutes.
4. Pour the sauce over the meat and serve.
Butter Chicken
Nick was up in the Gold Coast a few weeks ago and one night Simone and her friend from Melbourne, Neetu, came over for dinner. I decided to make butter chicken for dinner. Nick and I are obsessed (to say the least) with butter chicken from a local Indian restaurant near Nick called Indian Palace. Just thinking of it is making my mouth water.
This recipe is from a magazine article which I have kept from about 8 years - finally I have made it. The sauce is not as thick and creamy as from Indian Palace but it does have some wonderful flavours. (To bruise the cardamon pods, press on them with a knife until the outer layer splits.)
Butter Chicken
Ingredients
- 750g diced chicken breast (or thigh fillets)
- 3 cloves of garlic, crushed
- 2tsp garam masala
- 2tsp ground coriander
- 2 tsp ground cumin
- 1/2 tsp chilli powder
- 2 tsp paprika
- 140g yoghurt
- 80g butter (I used about 50g)
- 2 tbsp white vinegar
- 2 tbsp tomato paste
- 410g can tomato puree (I used canned chopped tomatoes as I didn't have puree, however I do recommend using the puree)
- 180ml chicken stock
- 5 cardamon pods
- 1 cinnamon sticks
- 250ml cream
Method
1. Marinate the chicken in a bowl with garlic, garam masala, coriander, cumin, chilli powder, paprika and yoghurt for at least 3 hours.
2. Melt butter in a saucepan and add marinated chicken. Stir for 10 minutes
3. Add bruised cardamon pods, vinegar, chicken stock, cinnamon, tomato puree and tomato paste and mix well. Bring to the boil and then simmer it for 30 minutes (or until the sauce starts to thicken slightly).
4. Stir in the cream and let it cook for another 5-10 minutes.
5. Serve on rice with naan or chapati bread for dipping. Enjoy :)
Labels:
Butter Chicken
Saturday, May 8, 2010
Homemade Gnocchi
I spent an entire day last week making an unreasonably large amount of fresh gnoochi. I would recommend only making this recipe if you have a few hours to spare and you have a mouli (a hand operated grater). I don't have a mouli and so I spent a very long time mashing up the potatoes, first with a potato masher and then with a fork to ensure no lumps - highly unrecommended process which is boring, slow and tiring.
I eventually made the gnoochi and froze majority of it. Don't do it! They freeze together and form a blob of gnoochi dough which have to be re-rolled and cut into shape again.
This recipe, however does make very light fluffy gnocchi, which are delicious. This recipe comes from Alex Herbert, the head chef and owner of Bird Cow Fish in New South Wales.
Potato Gnocchi
Ingredients
- 1.5kg desiree potatoes (pink skin with yellow flesh)
- 2 eggs
- 2 tbsp grated parmesan
- 125g plain flour
-salt and pepper
Method
1. Place unpeeled potatoes with cold water in a saucepan. Bring to the boil and then reduce the heat to medium and let the potatoes simmer for 30 minutes. (Use a skewer to check if they're cooked completely but avoid doing this too often so that the potatoes don't become water logged)
2. Take potatoes out of the water and wrap in a tea towel. Leave for 10 minutes for the potatoes to dry properly.
3. Peel potatoes (best way is cutting the potatoes in half and the skin should peel off very easily) and pass them through a mouli grater. Place the grated potatoes, eggs, salt, pepper and parmesan and mix gently. Sieve the flour into the bowl and gently fold. (I highly recommend sifting the flour as this aerates the flour and makes the gnocchi light and fluffy.
4. Flour a cutting board and place about 2-3 tablespoons of the mixture and roll out into a sausage shape with a thickness of about 1.5cm. Cut each sausage into 2cm pieces and roll in flour.
5. Cook the gnocchi in boiling salted water for 3 - 5 minutes.
I made a four cheese sauce to serve with the gnocchi however I didn't record the amounts but it was made from butter, milk, blue cheese, parmesan, tasty, Kraft cheddar cheese (best cheese for sauces as it melts into a homogenous mixture - thanks Nick), salt, pepper, oregano and cream.
Labels:
Gnocchi
Tuesday, April 27, 2010
Chicken Satay Skewers
Two friends, Simone and Sam came over for dinner the other night. One thing about living by myself that I don't like, is eating dinners alone and so Simone and I try to have at least one dinner together a week. This time I made chicken satay skewers served on rice. My pots are very low quality and therefore rice doesn't cook very well in them (last time was a bit of a disaster) and so Simone brought over her rice cooker. Sam brought his mum's coleslaw which was delicious! Dinner was followed with creme caramel, the recipe is in the post below.
The recipe for the satay sauce is not very accurate as I made it up as I went along and completely forgot to write down the amounts. So if making it, dont be afraid to add more or less of certain ingredients to your liking. I made the satay sauce before dinner and warmed it up on the stove at dinner adding a little water to thin it out a bit.

Chicken Satay Skewers
Ingredients
Marinate
- 500g chicken breast one minute steaks
- 2 large garlic cloves
- 2 tablespoons of fish sauce
- 1 tablespoon fresh grated ginger
- wooden skewers
Satay Sauce
- oil for frying
- 1 clove of crushed garlic
- 2 baby onions or 1 small brown onion or 4 shallots
- 2 tablespoons of brown sugar
- 3 tablespoons of crunchy peanut butter
- 1 small can of light coconut milk (165ml)
- 3 tablespoons of soy sauce
- 1 tablespoon kecap manis
- juice of a 1/4 lemon or 1/2 lime
Method
1. Cut lengthways each chicken steak into three pieces and skewer them onto the wooden sticks.
2. Mix crushed garlic cloves, fish sauce and ginger and rub onto the chicken skewers. Refrigerate for 3-4 hours.
3. For the sauce, cut the onions very finely (you don't want the onion to give any texture to the sauce but rather just flavour). Add the garlic and onion to a pan over medium heat. Stir regularly.
4. Cool till onion is lightly golden and then add the brown sugar. Caramelise the onion for 5 minutes and then add the peanut butter, coconut milk, soy sauce, kecap manis and juice of lemon or lime. Stir until the peanut butter has melted and all the ingredients have been incorporated. Take off heat.
5. To cook the chicken skewers, heat a large heavy based frying pan and olive oil on medium-high heat. Place the skewers on the hot pan and seal the chicken for a minute on each side. Continue to cook for a few more minutes until the chicken is just cooked. (The best way to do so, is ensuring the sides of the skewers, not exposed to the frying pan, is no longer pink. Wait a minute after this moment)
6. Serve the chicken skewers with a generous amount of the satay sauce poured over.
The recipe for the satay sauce is not very accurate as I made it up as I went along and completely forgot to write down the amounts. So if making it, dont be afraid to add more or less of certain ingredients to your liking. I made the satay sauce before dinner and warmed it up on the stove at dinner adding a little water to thin it out a bit.
Chicken Satay Skewers
Ingredients
Marinate
- 500g chicken breast one minute steaks
- 2 large garlic cloves
- 2 tablespoons of fish sauce
- 1 tablespoon fresh grated ginger
- wooden skewers
Satay Sauce
- oil for frying
- 1 clove of crushed garlic
- 2 baby onions or 1 small brown onion or 4 shallots
- 2 tablespoons of brown sugar
- 3 tablespoons of crunchy peanut butter
- 1 small can of light coconut milk (165ml)
- 3 tablespoons of soy sauce
- 1 tablespoon kecap manis
- juice of a 1/4 lemon or 1/2 lime
Method
1. Cut lengthways each chicken steak into three pieces and skewer them onto the wooden sticks.
2. Mix crushed garlic cloves, fish sauce and ginger and rub onto the chicken skewers. Refrigerate for 3-4 hours.
3. For the sauce, cut the onions very finely (you don't want the onion to give any texture to the sauce but rather just flavour). Add the garlic and onion to a pan over medium heat. Stir regularly.
4. Cool till onion is lightly golden and then add the brown sugar. Caramelise the onion for 5 minutes and then add the peanut butter, coconut milk, soy sauce, kecap manis and juice of lemon or lime. Stir until the peanut butter has melted and all the ingredients have been incorporated. Take off heat.
5. To cook the chicken skewers, heat a large heavy based frying pan and olive oil on medium-high heat. Place the skewers on the hot pan and seal the chicken for a minute on each side. Continue to cook for a few more minutes until the chicken is just cooked. (The best way to do so, is ensuring the sides of the skewers, not exposed to the frying pan, is no longer pink. Wait a minute after this moment)
6. Serve the chicken skewers with a generous amount of the satay sauce poured over.
Labels:
Chicken Satay Skewers
Monday, April 26, 2010
Auntie Debbie's Creme Caramel
This recipe was given to me by my aunty Debbie. She made it for dessert once when I was visiting Perth and it was so delicious I had to get the recipe off her, however I had never had the chance to make it though. I came across the recipe when I was looking through my recipe book and a few friends were coming around for dinner so I made it for dessert.
This dessert is light and very morish. Note that the pot in which you make the caramel needs to be soaked overnight with water and dishwasher powder. The caramel will come off very easily, if not soaked it takes a lot of scrubbing! Make sure you cool the milk for the custard, otherwise the eggs will be cooked by the milk.
Debbie's Creme Caramel
Ingredients
Caramel
- 200g caster sugar
- 1 tablespoon water
Custard
- 6 eggs
- 1L of milk
- 150g caster sugar
- few drops of vanilla essence
Method
1. Preheat oven to 180ºC
2. Place sugar (200g) and water in a pot over medium heat, stirring occasionally until all the sugar is melted and turns to a slightly golden colour.
3. Pour caramel over the bottom of a round pan. Don't be to worried if the caramel doesn't cover the entire pan before it sets as during the cooking process the caramel will even out
4. Pour milk with vanilla essence in a pot over medium heat until it boils. Take off heat and allow to cool to room temperature.
5. Beat eggs with the sugar with an electric hand mixer until just combined. Pour milk into the egg mixture and whisk well.
6. Pour the egg mixture through a sieve into the tin
7. Place the tin into a cold water bath and place into the oven for 1 hour.
8. Cool. Turn the mould out onto a plate and serve. Enjoy :)
Labels:
Creme Caramel
Asian Style Steamed Snapper
I made this snapper dish for dinner tonight. I was at work all day and was tired and hungry when I came home and this meal was quick and easy to make and tastes and looks great. In the past I have always made this dish with whole snapper and with white wine rather than soy sauce and cooking rice wine. The great thing about this dish is that not all the ingredients are necessary and many can be substituted. I was only cooking for one but the recipe can easily be doubled and the exact amounts of each ingredient aren't essential.
Steamed Asian Snapper
Ingredients
- 125g snapper fillet
- 1/4 hot red chilli, sliced thinly
- 1cm cube of fresh ginger, sliced thinly
- small clove of garlic, sliced thinly
- 1 coriander root, sliced
- 1/4 lemon (half slice thinly and other half used for lemon juice)
- 3 sprigs of coriander
- 1 tablespoon soy sauce
- 1 tablespoon cooking rice wine
- salt and pepper
- one teaspoon olive oil
Method
1. Preheat oven to 180ºC
2. Prepare all ingredients as stated in the ingredients above. Place in the middle of a sheet of aluminium sheet evenly, half the chilli, ginger, garlic, coriander root, sliced lemon, coriander.
3. Place fillet on top of the ingredients. Drizzle with olive oil and sprinkle with salt and pepper. Squeeze lemon juice over the snapper. Place the rest of the ingredients over the snapper.
4. Fold the aluminium foil over the snapper, so that the steam from the wine and soy sauce steams the fish.
5. Place in oven for 25-30 minutes.
6. Serve with coconut rice. Enjoy
Labels:
Asian Style Steamed Snapper
Sunday, April 25, 2010
Apple and Sultana Pie
I was feeling like making something sweet and fruity and the only fruit I had were apples and oranges and so I decided to make apple pie. The pastry recipe is from Donny Hay's cooking book 'Seasons' however I have halved the amount. This is such a simple pie to make and has only a few ingredients.
Apple and Sultana Pie
Serves 4
Ingredients
Pastry
- 85g plain flour
- 1/2 tablespoon caster sugar
- a pinch of bicarb powder
- 60g butter
- 25g cold water
Filling
- 4 apples, peeled, cored and cut into cubes (I used red delicious however it will taste better with tart green apples)
- 1 tablespoon lemon juice
- 35g caster sugar
- 1 teaspoon cinnamon
- handfull of sultanas (less or more is ok)
- a few drops of vanilla essence
- 1 tablespoon milk for brushing
- extra caster sugar for sprinkling
Method
1. Preheat oven to 180ºC
2. For the pastry, combine flour, bicarb and sugar in a bowl. Add cubed butter and use hand mixer to combine until it resembles breadcrumbs.
3. Gradually add the water whilst beating the mixture with the hand mixer until a smooth dough is formed.
4. Place the dough in cling wrap and into the fridge for 30 minutes.
5. For the filling, place the apple and lemon juice into a fry pan on medium heat and close for 10 minutes.
6. Take it off the heat and mix in gently the sultanas, sugar, cinnamon and vanilla essence.
7. Roll out the dough with extra flour. Place over the apple mixture in the fry pan. Ensure the dough covers all of the filling. Brush the dough with milk and sprinkle with caster sugar.
8. Place in oven for 35-45 minutes, until the pastry is cooked. Serve with fresh cream.
Labels:
Apple and Sultana Pie
Friday, April 23, 2010
Spinach,Ricotta and Feta Pie
This spinach pie is without question my favourite pie! Mum would make this pie late at night when I was young and I remember helping her put the egg wash over the pies before they went into the oven. Often I would stay up in bed waiting for the pies to finish cooking so I could have a little bit when they were still hot from the oven. I still remember the anticipation and excitement I felt when I knew mum was making it. This pie is my ultimate comfort food and brings back lots of memories.
I made 6 pies at home a few days ago and froze majority of them. They freeze well and are a great meal when there's nothing to eat in the house. Up north, here in the Gold Coast, there is no spinach except baby spinach leaves (and even they are rare to find), so I used a mixture of silver beet and baby spinach leaves.
Spinach, Ricotta and Feta Pie
Ingredients:
- 1 big bunch of spinach (or silver beet)
- 1 bunch of spring onion
- 1 bunch of dill
- 5 eggs
- 1/2 cup olive oil
- 2 tablespoons rice
- 2 pieces of greek feta (bought fresh from supermarket deli)
- 200g fresh ricotta
- 6 frozen puff pastry sheets (I used Pampers)
- handfull of coriander and parsley (optional)
Method:
1. Wash spinach leaves thoroughly. Place leaves and a little bit of the stalk in a colander and add salt. Squash the spinach with your hands and leave to drain for 15 minutes. Take out the puff pastry from the freezer and leave to thaw at room temperature.
2. Preheat oven to 200ºC.
3. Meanwhile in a large bowl add broken up ricotta and feta, 4 eggs, rice, oil, sliced dill, spring onion, parsley and coriander. Squeeze out all the water from the spinach leaves and add to bowl. Mix thoroughly.
4. Lay out one piece of puff pastry and add approximately 3-4 large tablespoons of the filling into the middle of the pastry. Fold the pastry into thirds so that a rectangular pastry is formed (refer to photo). Using a fork close down the ends of the pastry. Repeat this for all the pastry sheets.
5. Place on a baking tray a few cm apart and brush with egg white wash.
6. Place in 200ºC oven for 10 minutes and then turn the heat down to 180ºC and cook for another 30 minutes.
7. Take the pies out of the oven and let them cool a little bit before eating. Enjoy
Labels:
Spinach Ricotta and Feta Pie
Subscribe to:
Posts (Atom)